Git & Github Guide
Prerequisites
Using any development tool on your system will require an installation of your OSs relevant dev tools. On MacOS or Linux, this is easily achieved by running one of the following on your command line:
Linux systems
Debian, Ubuntu, etc.
sudo apt install build-essential
Arch, Manjaro, etc.
sudo pacman -Sy base-devel
Mac0S
xcode-select --install
Windows
No prerequisites required
Installing Git
Git can be installed via its installer here. Alternatively, Mac0S and Linux users can install git via Homebrew or via their respective linux package manager (see instructions).
Contributing to a project
Recommended Workflow
- (Optional) Fork a repository
- Clone repository
- Navigate to repository files via your command line.
- Create a branch.
- Navigate to branch.
- Make & commit changes
- Push changes
- Repeate steps 6-7 as many times as necessary
- Open a github pull request
Navigating Github (steps 1-3)
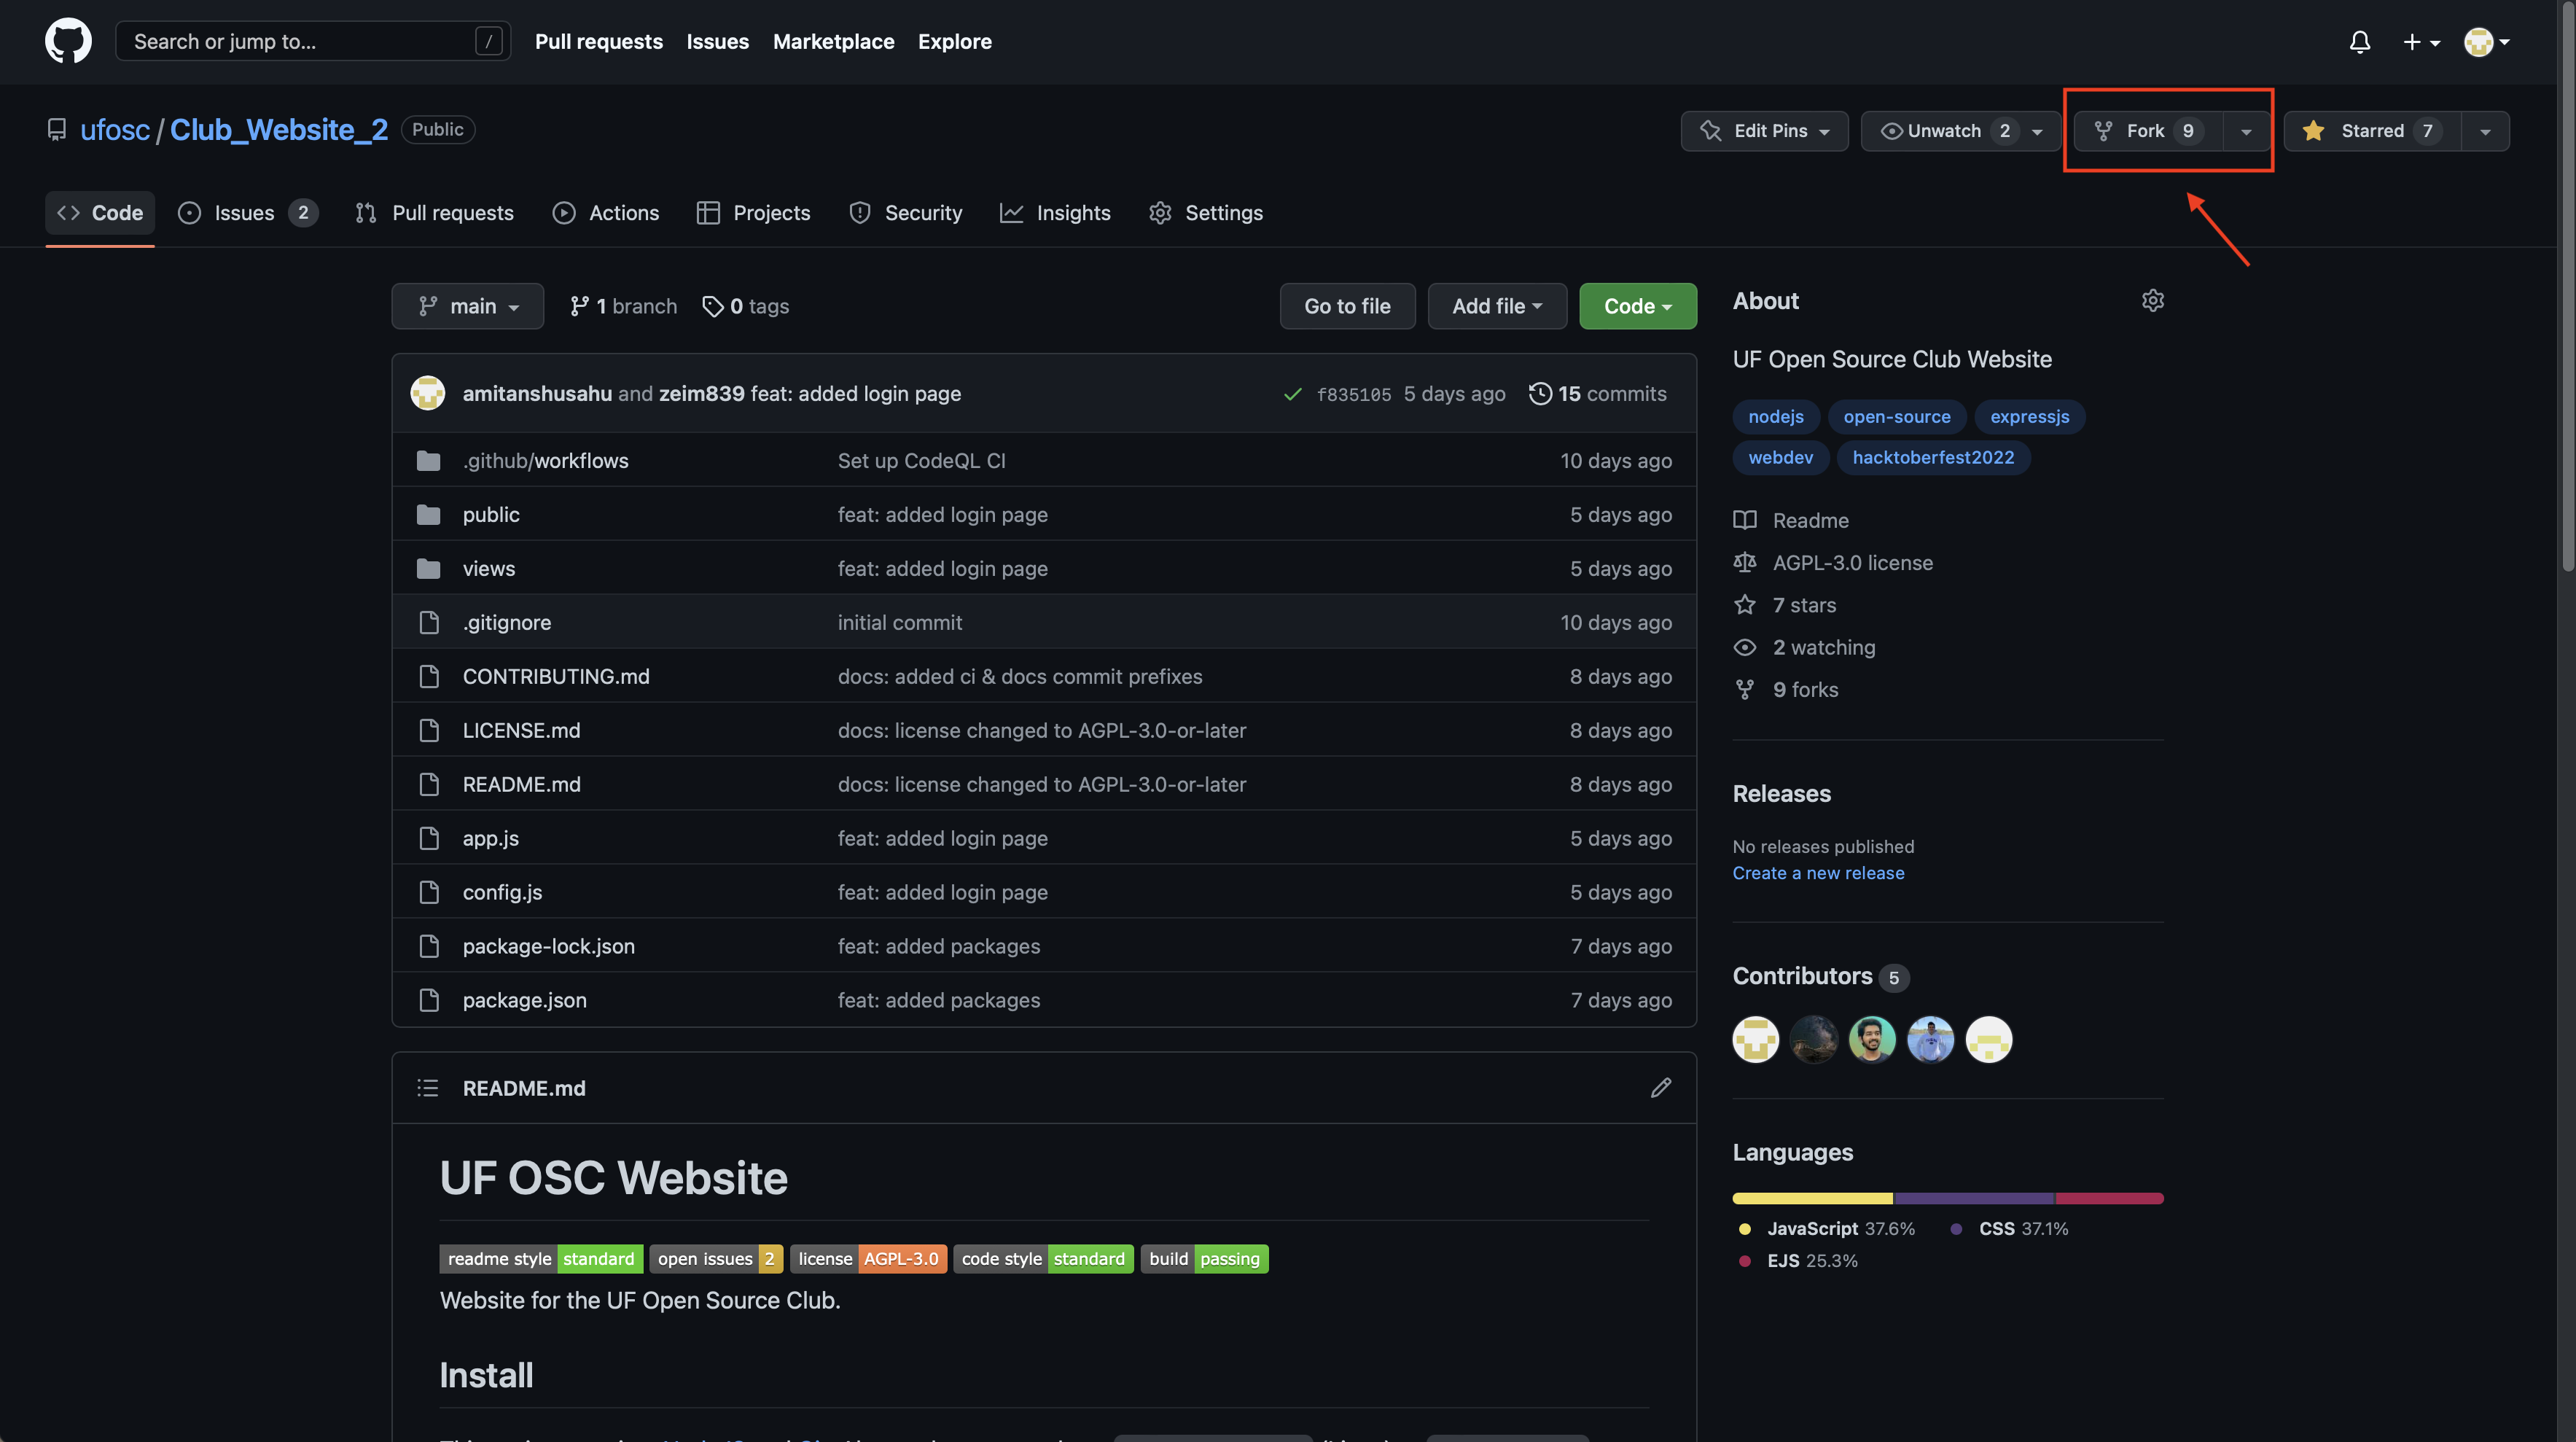
Forking a repository: If you're working on your own repository or have explicit permission to modify the source repository, then you can skip this step. Otherwise, forking will allow you to create branches and push changes to a personal copy before you can open a pull request (you most likely wont be able to do directly on the original repo without special permissions).

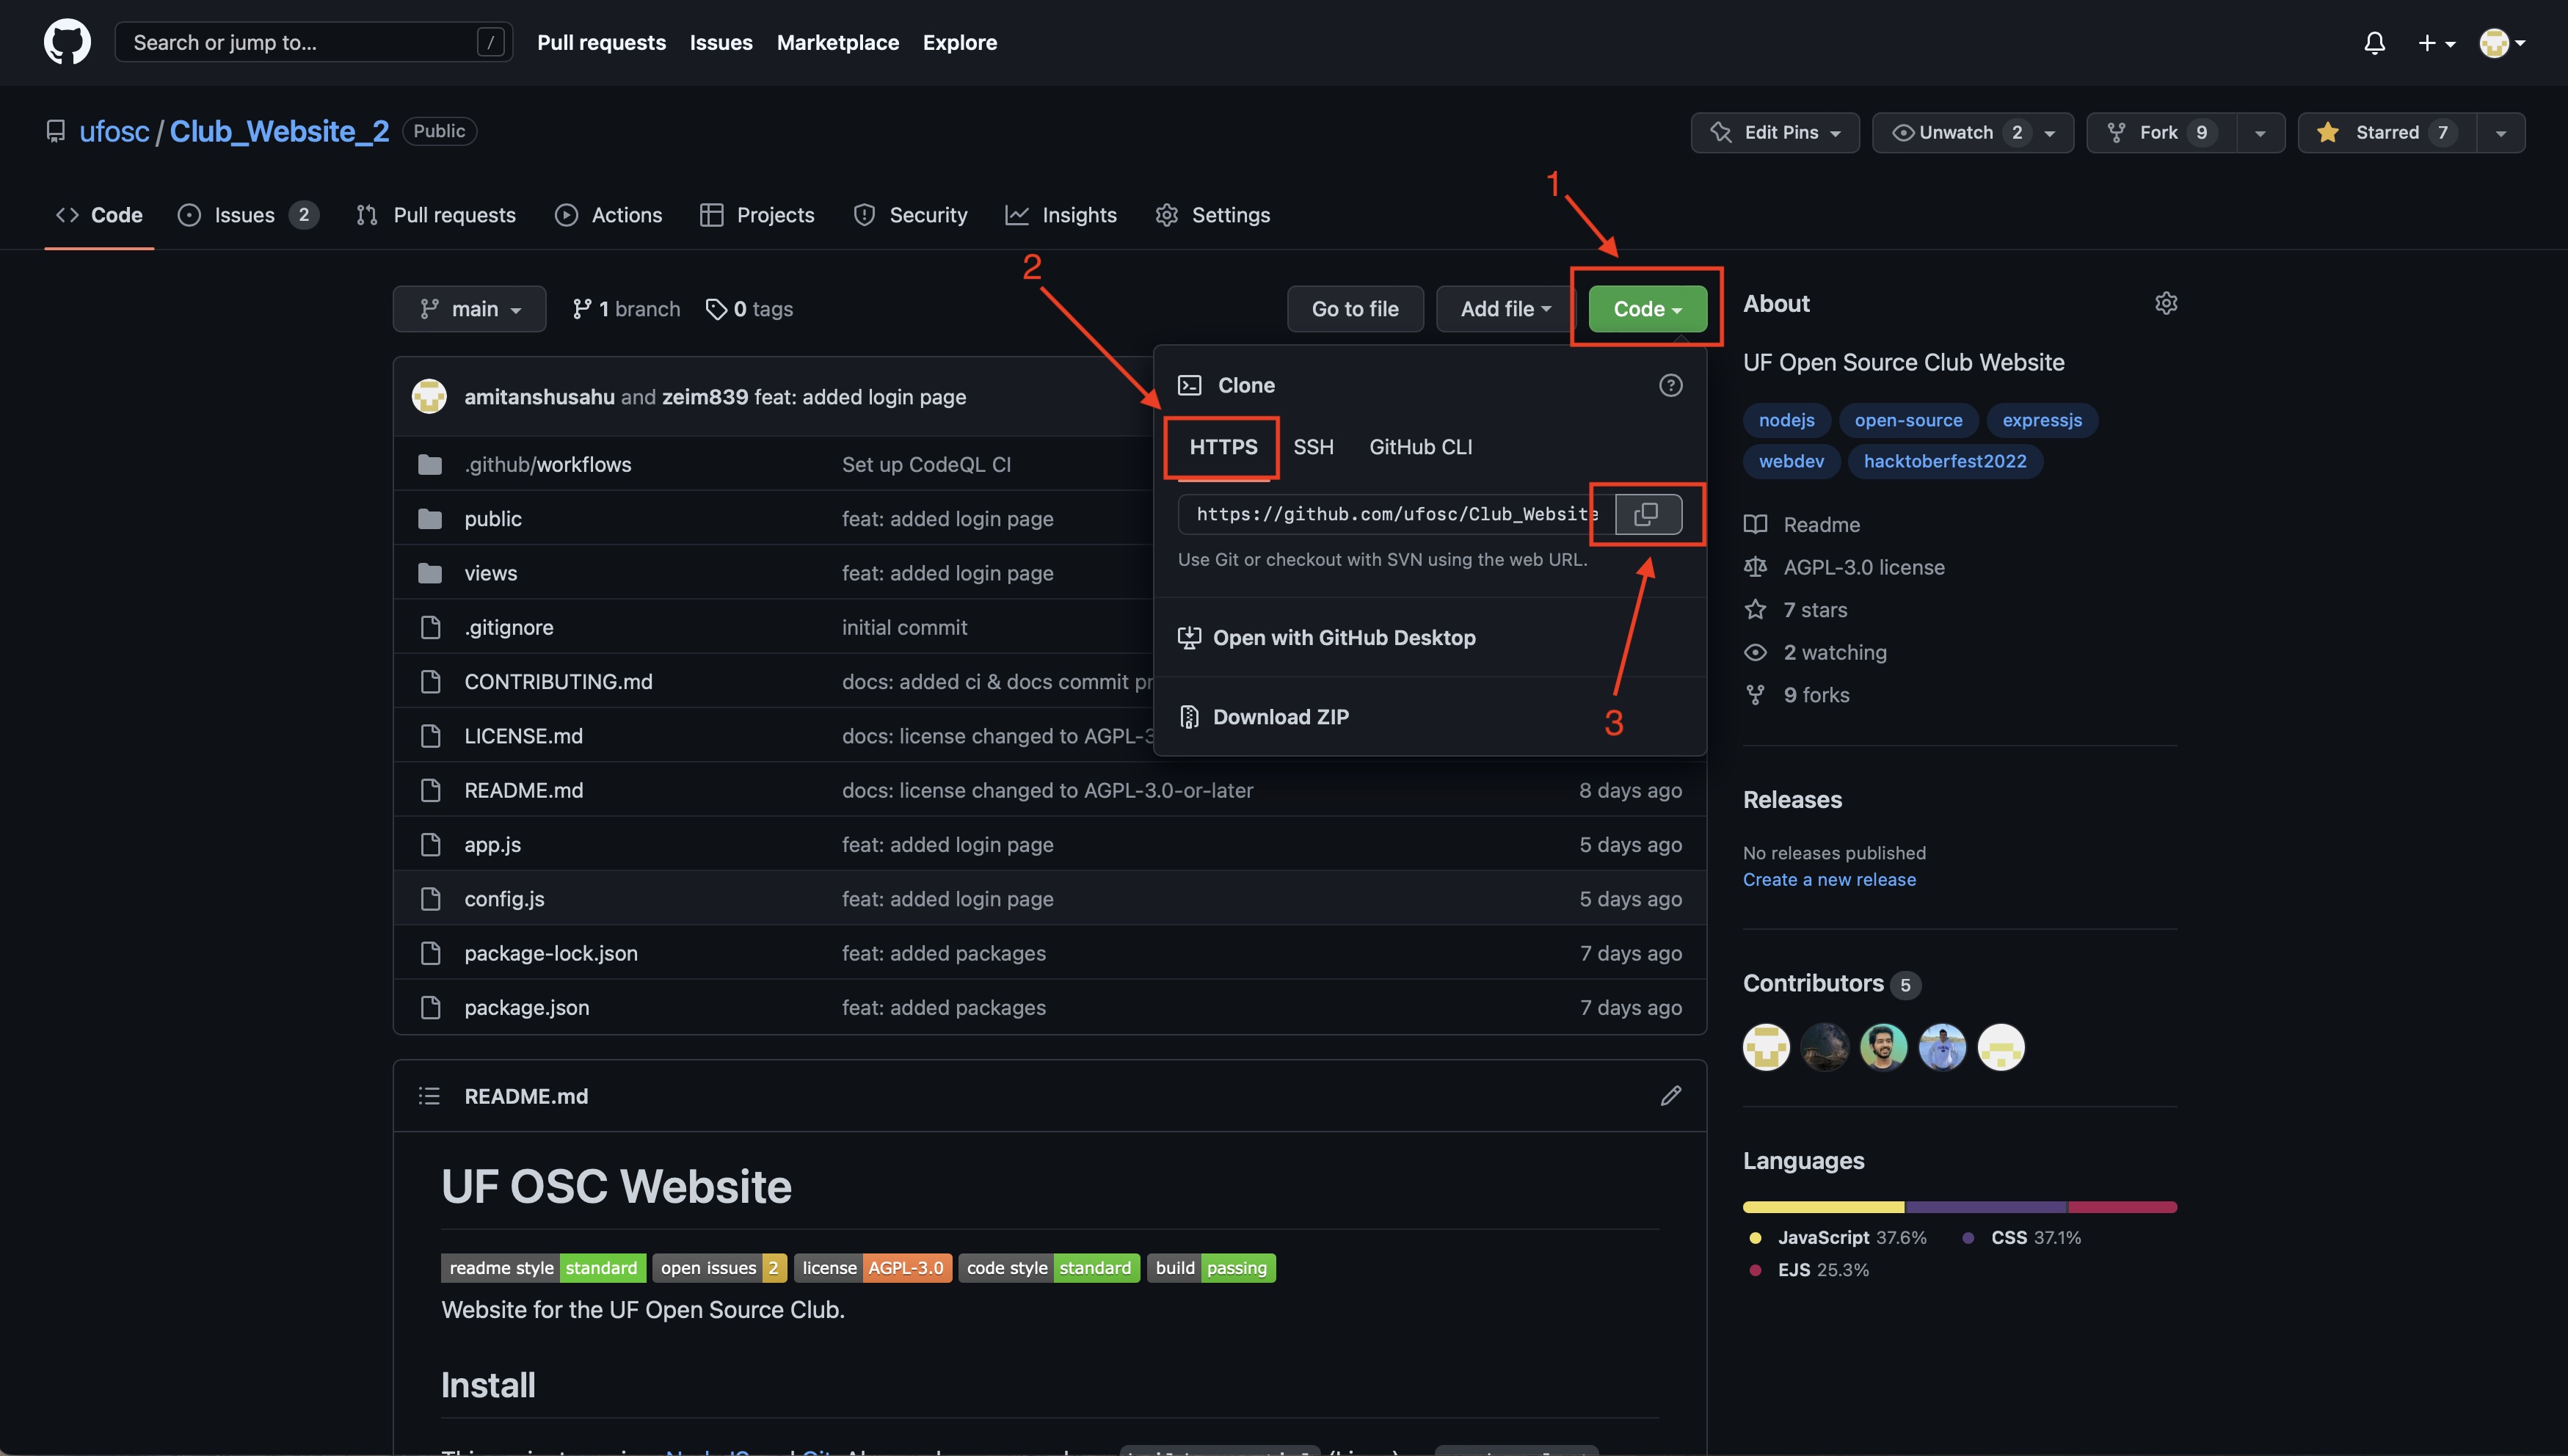
Cloning a repository: If you've just forked a repo, make sure you are cloning your fork and not the original. Github should redirect you automatically; if it doesn't, you can navigate to your Profile>Repositories and select the fork from there.
To clone, click on the Code button and copy the HTTPS source:

Then, open up your terminal and type:
cd [desktop/downloads, wherever you want to copy to]
git clone [source you've just copied]
cd [Name of your project]
git clone will copy the project onto your desired directory, whilst cd will allow you to navigate between directories. At this point, you should be in your project's main folder. To show a list of all available files, you can run:
ls
Contributing with the command line (steps 4-8)
To follow steps 4-8 in the command line,
Fetching & pulling
If you've just cloned a repository then there's (probably) no need to do this. However, you'll want to run these commands before you start working on new contributions to make sure your main branch is up-to-date with your source - you dont want to start making changes to an old version of the codebase.
First of all, make sure you're on the main branch:
git checkout main
Then, fetch:
git fetch
Fetching will ping the github server and download new changes. However, Git doesn't automatically apply these changes because in case you're still working on something - you'll need to do this yourself.
At this point, if you've made any changes you should save them before pulling using. Pulling might also give you an error if you have uncommited changes - even if you dont want to keep them. You can resolve these errors (and save your uncommited work) by running:
git stash
Then, load the new changes with pull:
git pull
If at this point you want to discard your old uncommited changes, then skip the following step. Otherwise, you can restore your changes with:
git stash pop
If you ever want to see an organized list of all your changes and staged work, you can run:
git status
This will also show you the uncommitted work you may (or may not) want to save before pulling.
Creating a branch
Branching allows you to maintain a fresh, isolated copy of the codebase for you to implement new features in. Once you've made sure you're on main (ALWAYS branch from main, unless otherwise instructed), you can create a new branch with:
git branch [your_branch_name]
At this point, you're still on main, so you want to navigate to your new branch with:
git checkout [your_branch_name]
Making and committing changes
Commits are the changes that you're "committed" to, meaning you are certain about wanting to keep and push them to the original source of your project. Once you are done working on your code, you can view all your changes with:
git status
This will show you a list of staged, uncommited and untracked files. New files are always untracked because git has never heard of them before - you'll want to treat these the same as uncommitted changes. Uncommited changes are changes made to files that git knows about, but said changes haven't yet been committed. Finally, staged changes are the changes that will be saved to a commit once you commit your work.
Your goal is to move all the changes you are happy with to the 'staged' portion in git status. Before doing this, make sure to review all your uncommited and untracked changes and decide which of those you want to keep or discard.
Then, begin staging your desired changes with:
git add [file_name]
You can add multiple files at once with:
git add [file_name] [file_name2] [file_name3] ...
Once youre ready, you can commit (i.e. "finalize/save") these changes using:
git commit -m "enter a message describing your changes"
You dont have to add all your changes into a single commit - and its probably best if you dont. You can repeat these steps as many times as you want: making changes, staging, and committing as many times as necessary. Its always a good idea to separate your work into multiple commits, just make sure to use descriptive and detailed messages.
Once you've made your changes, you can sync with github using:
git push origin [name of your current branch]
If you open up your fork page on github, you'll probably see a message alerting you of these new changes. These are not final yet, you'll need to merge your fork before they'll appear on the main branch (more on that later).
Though you can technically push as often and as many times as you want, it's probably a good idea to wait until you're all done with your work. In the event that you want to remove or backtrack one of your commits, it'll be easier to do so when they haven't yet been synced with github.
Contributing with VSCode (steps 4-8)
It's still a good idea to be familiar with the command line, as VSCode will sometimes prompt you with errors that can only be resolved by manually operating your terminal.
Making a pull request (merging with main)
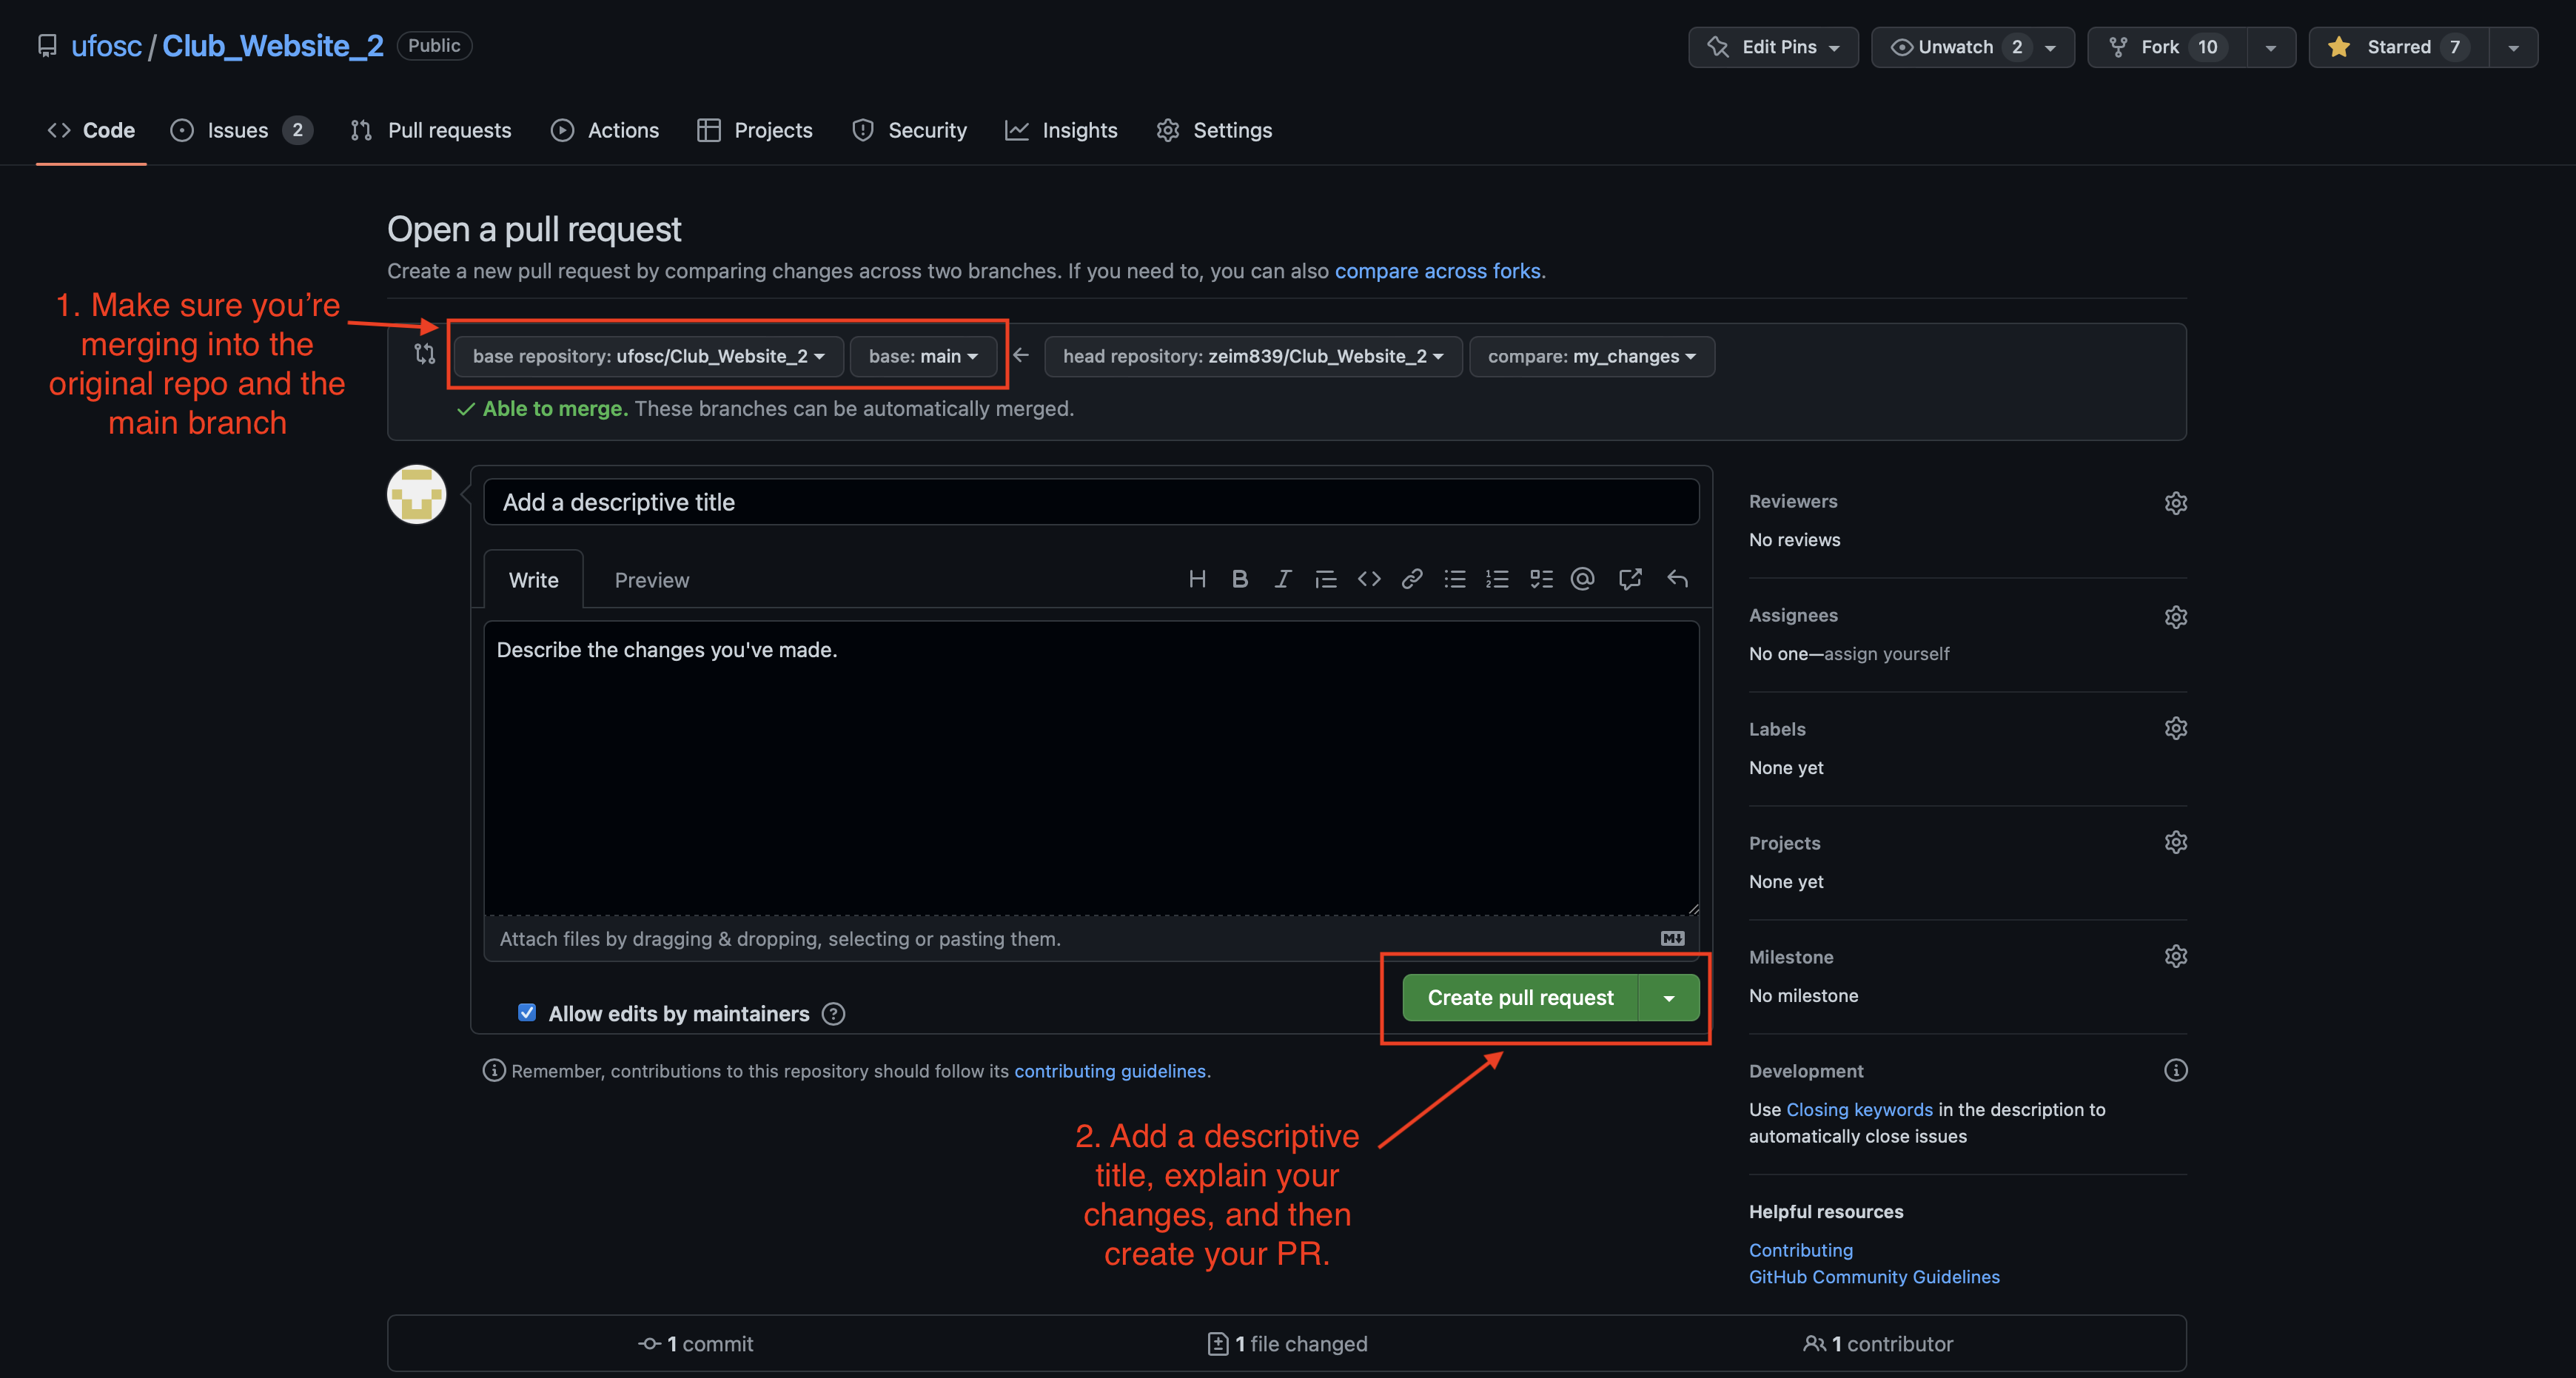
Opening pull requests is how you share your work with your project maintainers. It organizes your local work and opens a request to merge this work into the original repository. Once you've committed and pushed your changes, navigate back to your fork:

You'll want to click on "Compare & pull request".
Finally:

Keeping your fork up to date
You'll want to stay up to date with new changes so that you're always starting your work on the latest version of the codebase. To do this, you'll need to regularly sync your fork. An option should appear on your fork's page to sync with original repo. You'll need to sync it regularly and then update the copy on your laptop with:
(make sure you're on main):
git checkout main
Download changes:
git fetch
Load changes:
git pull