Integrating with OAuth2
One of the goals of OpenWebServices is to establish a common authentication service for use across Open Source Club and UF projects. The OAuth2 implementation allows project developers to authenticate users using their Open Source Club credentials. This enables interaction, state management, and data sharing among various projects.
OpenWebServices is RFC6749 compliant, meaning that developers can access a user's private resources by (1) first, asking the user for their permission, and (2) without accessing the user's password.
You will need the Open Source Club's permission to register a client. Please contact a team member via the discord server or contact form.
Definitions
- Resource Owner (user): "An entity capable of granting access to a protected resource" RFC6749, a.k.a an end-user.
- Resources: information and privilidges owned by users, for example: their first and last name, email address, permission to access a service, etc.
- Client: the third-party application that attempts to access the user's resources, i.e. the program that the user is trying to log into.
Creating an OWS Account
Clients are owned by users, so the first step to creating a client is registering an OWS account. This can be accomplished through the sign-up page:
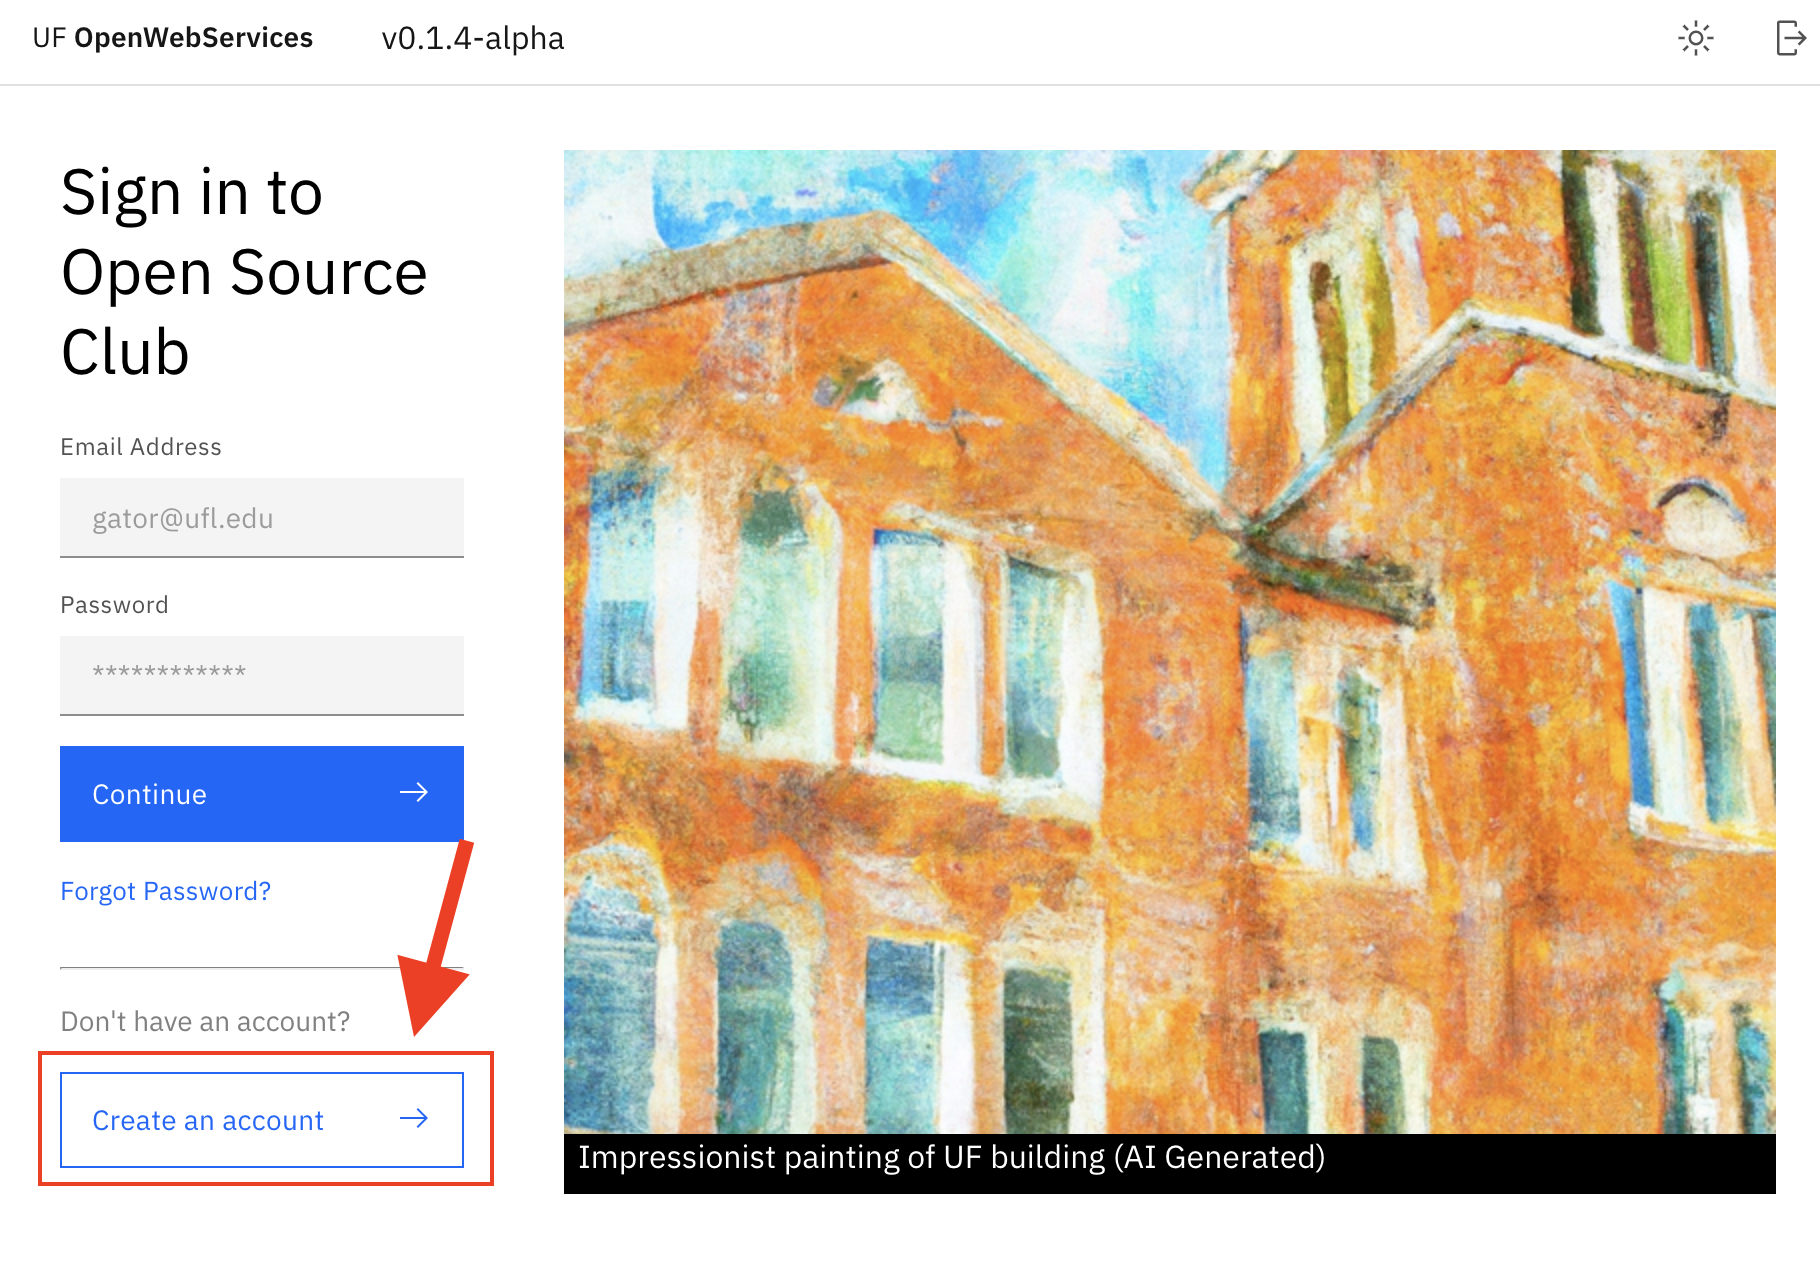
You can access the page by clicking here. You can then enter your details in the form:
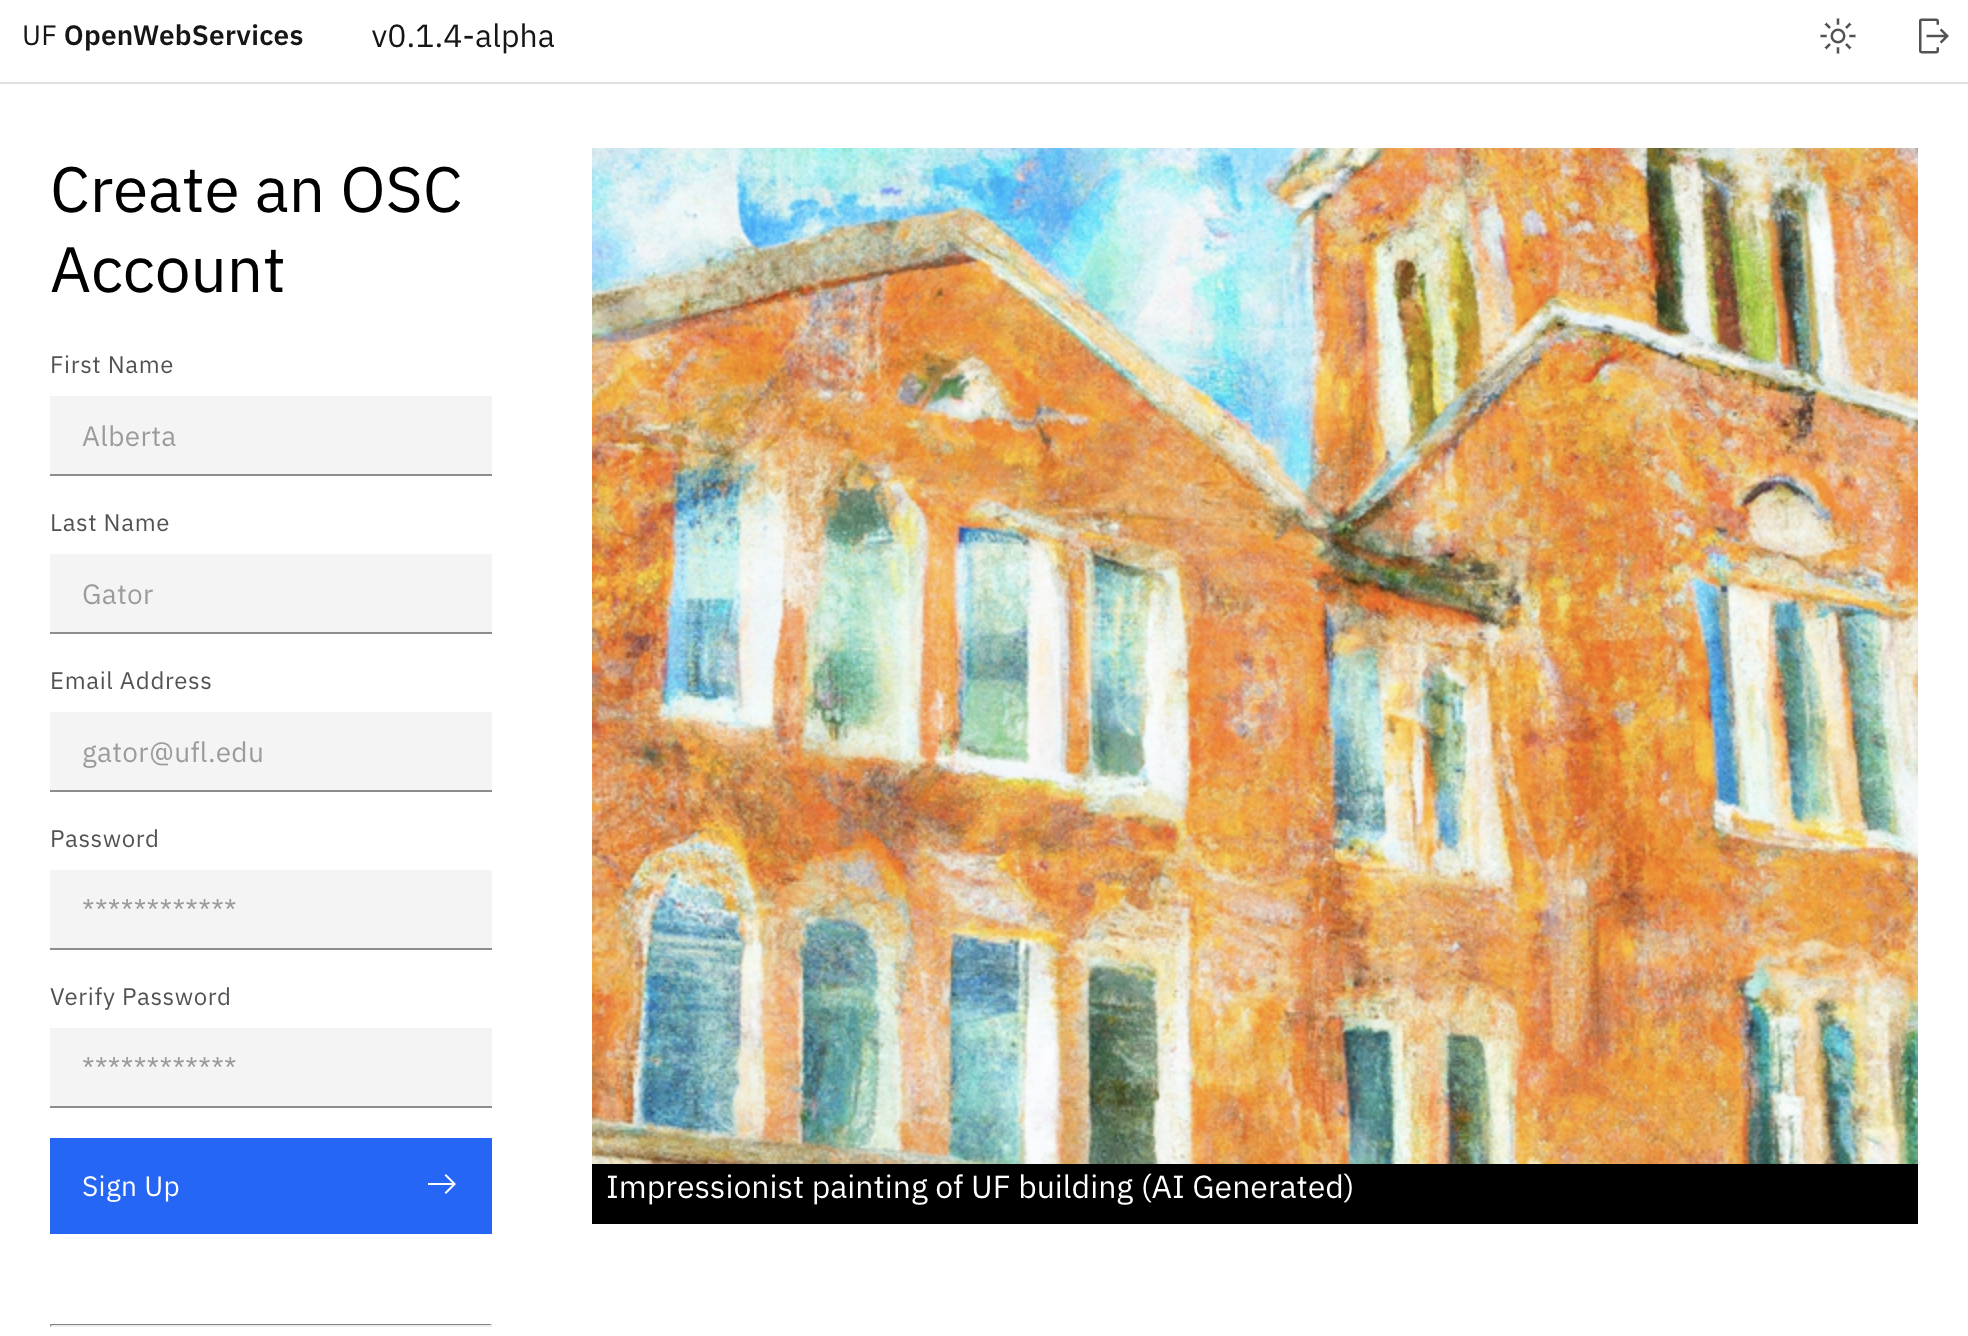
Once done, you'll be prompted to verify your email. Check your inbox (and spam folders) for an email containing the verification URL, and then open the URL in your browser.
Registering a Client
This section is work in progress. To register a client, contact a member of OSC.
Once registered, you will be provided with the following information:
{
    "message": "success",
    "id": "<YOUR UNIQUE CLIENT ID>",
    "pkey": "<YOUR PRIVATE KEY>"
}
Your private key pkey must be kept secret. It will be used to authenticate your client in the authorization grant scheme (see Authorization Schemes). If you're using the implicit grant scheme, the private key is not necessary.
You must take note of the client id - unlike the private key, the client id does not have to be secret. You'll be using the client id to authorize users.
Authorization Schemes
Authorization scheme refers to the means by which a user and client interact to enable authorization. Two distinct schemes are described: the authorization grant and implicit grant schemes.
Authorization grants are used by clients that can securely store client access tokens. This entails having a dedicated, isolated backend server. Clients that choose to use the authorization grant scheme have more resource access privilidges and are more likely to be granted access to users' sensitive data. Additionally, your client will be issued a refresh token, which means you can continue processing user information even after the original access token expires. If your project uses ExpressJS, Springboot (backend), or some other dedicated backend server, then you're eligible for the authorization grant scheme.
Implicit grants are for clients without the capabilities necessary to reliably secure access tokens, e.g. website frontends (without a backend server). Pure-frontend websites expose private information to the browser. XSS attacks, browser history APIs, CORS vulnerabilities, or anything with access to the DOM can potentially leak client access tokens. These types of clients are restricted to only (a) identifying the user and (b) accessing their publicly available information.
Deciding between Implicit & Authorization Grant Schemes
If your client application does not implement a dedicated server backend, then your only choice is implicit grant. However, there are situations in which a project with a dedicated backend may not want to use the authorization grant scheme. You should use authorization grant if:
- You want to keep accessing the user's resources for longer than 20 minutes.
- You need access to private user information.
If your sole intent is to identify a user (i.e. verify that they exist, access their full name and unique ID, and differentiate them from other users), then the implicit grant scheme will suffice. Implicit grant clients will need to ask the user to re-authenticate every 20 minutes.
Implicit Grant Scheme
+----------+
| Resource |
|  Owner   |
|          |
+----------+
     ^
     |
    (B)
+----|-----+          Client Identifier     +---------------+
|         -+----(A)-- & Redirection URI --->|               |
|  User-   |                                | Authorization |
|  Agent  -|----(B)-- User authenticates -->|     Server    |
|          |                                |               |
|          |<---(C)--- Redirection URI ----<|               |
|          |          with Access Token     +---------------+
|          |            in Fragment
|          |                                +---------------+
|          |----(D)--- Redirection URI ---->|   Web-Hosted  |
|          |          without Fragment      |     Client    |
|          |                                |    Resource   |
|     (F)  |<---(E)------- Script ---------<|               |
|          |                                +---------------+
+-|--------+
  |    |
 (A)  (G) Access Token
  |    |
  ^    v
+---------+
|         |
|  Client |
|         |
+---------+
In the implicit grant scheme, you redirect users to the OWS authentication website. Your client's information is passed along with the request, in the form of URL parameters (more on this later). The user enters their email address/password and is asked to acknowledge their consent to use your client. Once the user accepts, the OWS website HTTP-redirects the user back to your client website. An access token is embedded into the redirect URL, which your client may now use to access the user's information.
You may begin the authorization flow by creating an HTML button that redirects users to the OWS authentication website. The choice of how to redirect the user is left up to you to decide, but a minimal example is illustrated below:
<button
    onclick="window.location.href='https://auth.ufosc.org/authorize?response_type=token&client_id=[CLIENT_ID]&redirect_uri=[URI]&state=[STATE]'
>
Login with OSC
</button>
The button redirects users to https://auth.ufosc.org/authorize?response_type=token&client_id=[CLIENT_ID]&redirect_uri=[URI]&state=[STATE]. You must replace [CLIENT_ID] with your client id (which was generated when the client was created), [URI] with the redirect URL-encoded URI which you registered, and a [STATE] string.
Using a state string is imperative in protecting against XSS and cross-origin attacks. Not using a secure state string may result in your account/client being banned. See security for further instructions.
The <URI> parameter MUST be URL-encoded, otherwise you'll receive an error. See urlencoder.org for an example encoder, or MDN for implementation instructions in JavaScript.
At this point, the user will need to enter their credentials using the secure OWS authentication website. Once done, they'll be redirected to the <URI> provided above. The redirect will attach three parameters to the URL: the access token, token type, and state. As a result, the final URL will look like so:
https://my-redirect-uri.com/?access_token=65d505d98ed294abc0d10534&token_type=bearer&expires_in=1200&state=xyz
It is imperative that the client application verifies that the value of state is equal to the state provided in the first redirection (client-side) URI. If the state differs, it is likely that the authorization mechanism is under attack.
You may retrieve the access token using JavaScript, as shown below:
let params = new URLSearchParams(document.location.search);
let access_token = params.get("access_token");
You may now use the access token to retrieve the user's information. To identify the user, you'll use the api.ufosc.org/user API route. For documentation on accessing resources, see Accessing Resources.
Authorization Grant Scheme
+----------+
| Resource |
|   Owner  |
|          |
+----------+
     ^
     |
    (B)
+----|-----+          Client Identifier      +---------------+
|         -+----(A)-- & Redirection URI ---->|               |
|  User-   |                                 | Authorization |
|  Agent  -+----(B)-- User authenticates --->|     Server    |
|          |                                 |               |
|         -+----(C)-- Authorization Code ---<|               |
+-|----|---+                                 +---------------+
  |    |                                         ^      v
 (A)  (C)                                        |      |
  |    |                                         |      |
  ^    v                                         |      |
+---------+                                      |      |
|         |>---(D)-- Authorization Code ---------'      |
|  Client |          & Redirection URI                  |
|         |                                             |
|         |<---(E)----- Access Token -------------------'
+---------+       (w/ Optional Refresh Token)
The authorization grant scheme follows a pattern similar to implicit token flow. First, the user is redirected by the client to the OWS authentication website, with the client's id and options specified in the URL parameters. The user is prompted for their email address and password, and then asked for their consent to grant client access. Once approved, the OWS website redirects to the client's redirect URI, with a authorization grant code (not an access token) attached to the URL parameters.
The authorization grant is used to generate an access and refresh token. Unlike implicit token flow, the client must authorize itself in order to retrieve an access token. This is accomplished through a request to the OWS authorization server, in which the client attaches their ID, private key, and user authorization grant. If succesful, the client is issued an access token - which they can use to make API requests on the user's behalf for the next 20 minutes - and a refresh token - which they may use to issue a new access token once the previous token expires.
The authorization flow begins at the client application. In order to login, the user must be redirected to the OWS authentication website. An example implementing an HTML login button is displayed below:
<button
    onclick="window.location.href='https://auth.ufosc.org/authorize?response_type=code&client_id=[CLIENT_ID]&redirect_uri=[URI]&state=[STATE]'
>
Login with OSC
</button>
The button redirects users to https://auth.ufosc.org/authorize?response_type=code&client_id=[CLIENT_ID]&redirect_uri=[URI]&state=[STATE]. You must replace [CLIENT_ID] with your client id (which was generated when the client was created), [URI] with the redirect URL-encoded URI which you registered, and a [STATE] string. The redirect URL differs from the implicit flow URL only in its response_type parameter, which is token for implicit flow and code for authorization grant.
Using a state string is imperative in protecting against XSS and cross-origin attacks. Not using a secure state string may result in your account/client being banned. See security for further instructions.
The <URI> parameter MUST be URL-encoded, otherwise you'll receive an error. See urlencoder.org for an example encoder, or MDN for implementation instructions in JavaScript.
At this point, it is up to the user to enter their credentials and authorize access to the client application. Once done, they'll be redirected to the <URI> provided above. The redirect attaches two parameters:
https://my-redirect-uri.com/?code=65d8e41f4c09d49933b45680&state=xyz
It is imperative that the client application verifies that the value of state is equal to the state provided in the first redirection (client-side) URI. If the state differs, it is likely that the authorization mechanism is under attack.
The code and state parameter must be retrieved by the client application. An example of how to retrieve URL parameters in JavaScript is attached below:
let params = new URLSearchParams(document.location.search);
let code = params.get("code");
let state = params.get("state");
The code may now be used to issue an access token. Note: the access token allows the client to access the user's information, whilst the authorization code is used to generate the access token. The authorization code is a necessary precursor to verifying that the client application is secure enough to authenticate itself.
Issuing Access Tokens using the Authorization Code
To issue an access token, the client must send an API request to https://api.ufosc.org/auth/token. The request must include an Authorization header with the client's ID and private key. The Authorization header must assume the format below:
Authorization: Basic NjU4MDNjMGFjNmMwMDgxNzA5ZjU5NDlkOmVBMXdUbFNYMGtUNktnZUYzKzFCNW9HTGMvNDZDZEhuamRoTStjMFZFN0k9
Where Authorization is the header name, basic is the authentication scheme, and the string is a base64-encoded id and private key combination. The base64-encoded ID and private key must follow the syntax below:
BASE64(<CLIENT_ID>:<PRIVATE_KEY>)
Where <CLIENT_ID> and <PRIVATE_KEY> are the ID and key generated in the client-creation process. The BASE64() function indicates that the value should be base64-encoded and should not be part of the authorization string. Additionally, the client should attach the following in the URL parameters of the request:
grant_type=authorization_code
code=<AUTHORIZATION_CODE>
redirect_uri=<REDIRECT_URI>
client_id=<CLIENT_ID>
Where <CLIENT_ID> is the ID used in the authorization field, and <REDIRECT_URI> is the URI from the client's registration. The <AUTHORIZATION_CODE is the authorization code received from the OWS redirect. The final API request string should look similar to the example below:
https://api.ufosc.org/auth/token?grant_type=authorization_code&code=65c4141016aeea486a7bcee8&redirect_uri=https%3A%2F%2Fgoogle.com&client_id=65803c0ac6c0081709f5949d
The <REDIRECT_URI> parameter MUST be URL-encoded, otherwise you'll receive an error. See urlencoder.org for an example encoder, or MDN for implementation instructions in JavaScript.
A JavaScript using Axios example is illustrated below:
const REDIRECT_URI = encodeURI("your redirect URI"); // encodeURI handles URL-encoding.
const CLIENT_ID = "your client id";
const AUTH_CODE = "your authorization code";
const PRIV_KEY = "your private key";

const client_authorization = btoa(`${CLIENT_ID}:${PRIV_KEY}`) // btoa encodes in base64.

const URL = `https://api.ufosc.org/auth/token?grant_type=authorization_code` +
    `&code=${AUTH_CODE}&redirect_uri=${REDIRECT_URI}&client_id=${CLIENT_ID}`

axios({
  method: 'get',
  url: URL,
  headers: {
      'Authorization': `Basic ${client_authorization}`
  }
}).then((res) => {
    // Succesfully received response.
    console.log(res)
});
A successful response will include the following JSON body:
{
    "message": "success",
    "access_token": "<ACCESS_TOKEN>",
    "token_type": "bearer",
    "expires_in": 1200,
    "refresh_token": "<REFRESH_TOKEN>",
}
The <ACCESS_TOKEN> may now be used to access resources on the user's behalf. For further instructions, see Accessing Resources. The access token will be available for 1200 seconds (20 minutes). After that, you'll need to use the refresh token to automatically reissue a new access token. This is a security measure that protects against hijacked access tokens. With a refresh token, you can continue accessing the user's information until the user prohibits you from doing so, or until the client expires. The process of using a refresh token to generate new access tokens is described in the following section.
Refreshing Access Tokens
Tokens may be refreshed using the https://api.ufosc.org/auth/token route. Similar to the access token request route (above), the client must authorize itself by including its base64-encoded ID and private key combination. As before, the authorization header must assume the format below:
Authorization: Basic NjU4MDNjMGFjNmMwMDgxNzA5ZjU5NDlkOmVBMXdUbFNYMGtUNktnZUYzKzFCNW9HTGMvNDZDZEhuamRoTStjMFZFN0k9
Where Authorization is the header name, basic is the authentication scheme, and the string is a base64-encoded id and private key combination. The base64-encoded ID and private key must follow the syntax below:
BASE64(<CLIENT_ID>:<PRIVATE_KEY>)
Where <CLIENT_ID> and <PRIVATE_KEY> are the ID and key generated in the client-creation process. The BASE64() function indicates that the value should be base64-encoded and should not be part of the authorization string. Additionally, the client should attach the following in the URL parameters of the request:
grant_type=refresh_token
refresh_token=<REFRESH_TOKEN>
Where the <REFRESH_TOKEN> is the token received in the authorization grant request (specified in the section above). The server will respond with the new access token in the response body (JSON). An example is illustrated below:
{
    "message": "success",
    "token": "<NEW_ACCESS_TOKEN>",
    "token_type": "bearer",
    "expires_in": 1200,
    "refresh_token": "<REFRESH_TOKEN>"
}
The <REFRESH_TOKEN> is the same as before, whilst the <NEW_ACCESS_TOKEN> specifies a new access token for accessing resources on the user's behalf. The access token expires after 1200 seconds (20 minutes). To access resources using the access token, see Accessing Resources.
Security Measures
State
As per RFC6749:
State: An opaque value used by the client to maintain state between the request and callback. The authorization server includes this value when redirecting the user-agent back to the client. The parameter SHOULD be used for preventing cross-site request forgery as described in Section 10.12.
The state parameter is an important security measure in protecting against CSRF (cross-site request forgery) attacks. State is used as follows:
- The client attaches a state parameter that identifies the user's session.
- The authorization server (i.e. https://auth.ufosc.org) processes the request, and redirects back to the client. It attaches the same state value to its request.
- The client verifies that the state value is equivalent to the user's session string.
When the client verifies the state string, it is in essence verifying that the user's login request originated from the client application. If the state differs, then it is likely that an attacker is trying to login using a hijacked token.
As per RFC6749:
The client MUST implement CSRF protection for its redirection URI. This is typically accomplished by requiring any request sent to the redirection URI endpoint to include a value that binds the request to the user-agent's authenticated state (e.g., a hash of the session cookie used to authenticate the user-agent). The client SHOULD utilize the "state" request parameter to deliver this value to the authorization server when making an authorization request.
Once authorization has been obtained from the end-user, the authorization server redirects the end-user's user-agent back to the client with the required binding value contained in the "state" parameter. The binding value enables the client to verify the validity of the request by matching the binding value to the user-agent's authenticated state. The binding value used for CSRF protection MUST contain a non-guessable value (as described in Section 10.10), and the user-agent's authenticated state (e.g., session cookie, HTML5 local storage) MUST be kept in a location accessible only to the client and the user-agent (i.e., protected by same-origin policy).
Omitting the state parameter or intentionally using the state security measure haphazardly may lead to client/user ban & termination. The state parameter is imperative in securing both client applications and user accounts.
Error Handling
Errors from OAuth2 API
When interacting with the OWS OAuth2 API, you might come across a variety of errors. For consistency, these always conform the below format:
{
    "error": "invalid_token",
    "error_description": "client not found",
}
OAuth2 API errors are:
- In JSON body encoding.
- Respond with a non-200 error status code.
- Contain an "error" body field.
- May or may not contain an "error_description" field.
Errors in URL Parameters
When redirects are involved (i.e. when redirecting the user to prompt for login to a client application), the OWS dashboard will delegate error handling to the client application whenever the integrity of the redirect URL can be verified. For example, if you've correctly identified the client ID and redirect URL but specified a wrong response type, the dashboard will redirect to the redirect URL with the following URL parameters:
error=<ERROR_TYPE>
state=<STATE>
Where <ERROR_TYPE> is one of the error response types specified in RFC6749 and state is the variable specified in the original request. Optionally, an error_description parameter may be included; it specifies a user-readable error message.